What is a Facebook Pixel and what can it do?
Adults in America spend an average of 48 minutes on Facebook a day.
Let’s make use of this fact.
Facebook proves to be one of the most effective and cheapest ways to find leads (almost free using Marketplace). But there’s also a time and place you may want to run paid ads on Facebook for specific properties or to remind users to opt-in on your buyers list and more.
To do this… we use one of my favorite Facebook Ad strategies: Retargeting Ads
Retargeting Ads, are when ads are ran when a lead who has come to your site, leaves but is reminded to come back.
So if you want to run ads to…
- get visitors to get on your buyers’ list
- get leads to come back and purchase a piece of property
- get motivated sellers to come back and submit their property
… there’s a bit of technical things that need to happen. Specifically: adding a Facebook tracking ‘pixel‘ on your site.
Retargeting Ads
Essentially, a Facebook Pixel lets you better target your ads and see how effective they are at turning clicks into sales. Even better, is it allows you to also track and run retargeting ads. Meaning when someone visits your site, they get ‘pixeled’ and essentially you can continue showing them ads on Facebook or Instagram to remind them to come back to your site.
But if you’re not super tech-savvy, it can be a little difficult to actually figure out how to get Facebook Pixel up and running with WordPress, right?
To help you out, I’m going to give you a beginner-friendly method that helps you add the Facebook Pixel code.
So if you just want to use Facebook Pixel to create Lookalike audiences or running retargeting campaigns and other more basic features, this is the simplest solution for your needs.
How to add Facebook Pixel to Your WordPress Site
To manually add Facebook Pixel to WordPress, you have to complete two steps:
- Create a new Facebook Pixel at the Facebook website (if you haven’t already)
- Insert the tracking code from that Facebook pixel into the <head> section of your WordPress site
It’s nothing too complicated – I promise! Let’s get started…
Step 1: Create new Facebook Pixel via Facebook Ads Manager
To get started, go to the Pixels tab in Facebook Ads Manager. You can go straight there by clicking this link.
If you haven’t already created a Pixel (you can only create one Pixel per account), you can click the green button to Create a Pixel:
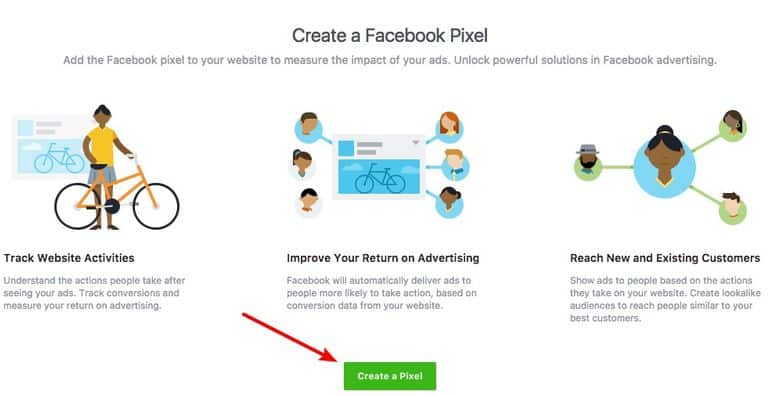
A box should appear that asks for a name – then all you need to do is click Create.
After that, you should see some options for how to add Facebook pixel to your website. Choose the Manually Install the Code Yourself option:
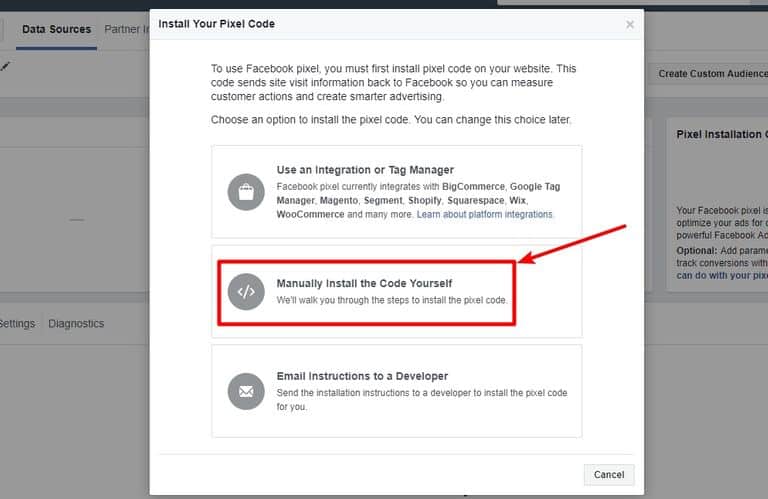
That should display the Facebook Pixel tracking code:
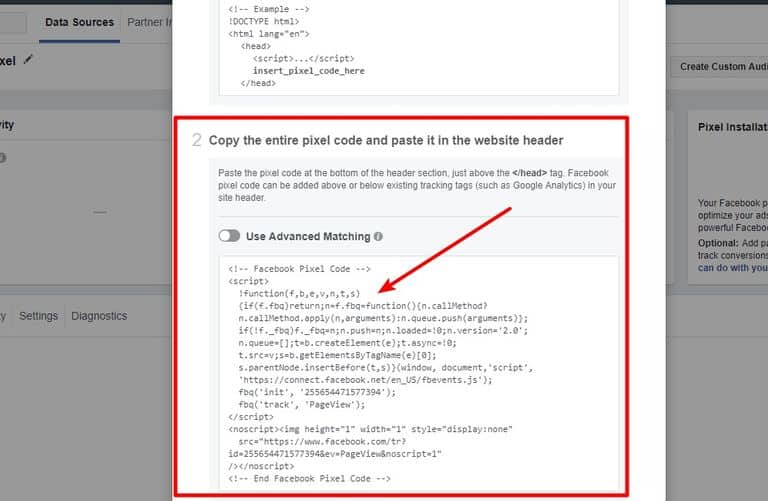
Keep this code handy because you’re going to need it in the next step.
Step 2: Add Facebook Pixel tracking code to WordPress <head> section
While there are a number of different ways that you can add code snippets like this to WordPress, I think the simplest method is a free plugin called Insert Headers and Footers: Insert Headers and Footers
How to install Insert Headers and Footesr
We always recommend that you backup your site before making any major changes
Go to your WP Admin dashboard
Plugins → Add New → Enter ‘Insert headers and Footers‘ in the search plugin text box → Hit the ‘Install Now‘ button → Activate the plugin
Adding your Tracking Code
Go to Settings → Insert Headers and Footers
Paste the Facebook Pixel tracking code into the Scripts in Header box
Save your changes
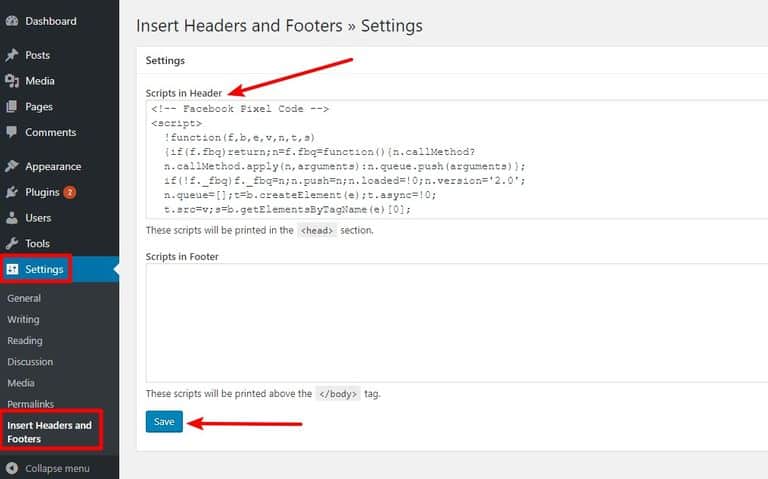
And that’s it! You just learned how to add Facebook Pixel to WordPress.
Now lets test if your new Facebook Pixel is working.
How to test if Facebook Pixel is working
After you add Facebook Pixel to WordPress, you need to do one more thing:
Make sure Facebook Pixel is actually working!
To do that, you install the Facebook Pixel Helper Chrome extension.
Once you have the Chrome extension activated, visit the site where you installed Facebook Pixel.
If your Pixel is working, you should see something like this when you click on the extension:
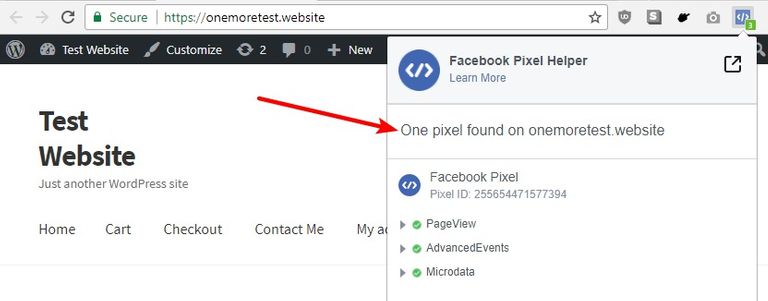
And there you go! That’s all you need to do to add Facebook Pixel to WordPress. Enjoy your retargeting, conversion tracking, and custom audiences!